Making homemade soap is a rewarding and creative process that allows you to customize your ingredients and create a product tailored to your needs. Whether you’re looking for a natural alternative to commercial soaps or starting a new hobby, this guide will walk you through the basics of soap making. Always ensure you follow safety protocols and regulations when crafting soap for personal or commercial use.
Homemade Soap: Ingredients and Tools You Will Need
Ingredients
- Lye (Sodium Hydroxide): A crucial ingredient for saponification. Handle with care.
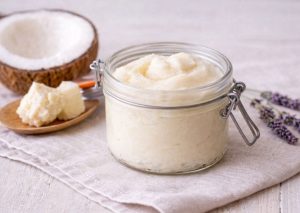
- Oils or Fats: Common choices include olive oil, coconut oil, almond oil, jojoba oil or shea butter.
- Distilled Water: Ensures the purity of the soap.
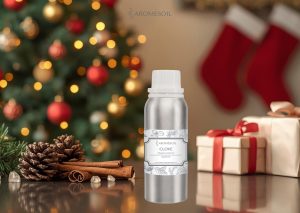
- Essential Oils or Fragrance Oils (Optional): For scent.
- Natural Colorants (Optional): Such as mica powder, clay, or herbal powders.
Tools
- Heat-resistant mixing bowls.
- Digital scale (for accurate measurements).
- Stick blender.
- Silicone soap molds.
- Safety gear: gloves, goggles, and a long-sleeved shirt.
- Thermometer (capable of measuring up to 200°F).
- Wooden or silicone spatula.
Safety Precautions
- Always work in a well-ventilated area.
- Wear protective gloves and goggles when handling lye.
- Keep lye and raw soap batter away from children and pets.
- Add lye to water, never water to lye, to prevent dangerous reactions.
Step-by-Step Instructions
- Prepare Your Workspace
Ensure your work area is clean, organized, and free of distractions. Set out all ingredients and tools. - Measure Ingredients
Use a digital scale to measure your oils, water, and lye precisely. Consult a soap calculator to ensure the correct ratio of lye to oils for your recipe. - Mix the Lye Solution
Slowly add lye to distilled water while stirring gently, avoiding fumes. Let the solution cool to around 100°F. - Heat and Combine Oils
Melt solid fats and mix with liquid oils. Allow the mixture to cool to around 100°F. - Combine Lye Solution and Oils
Slowly pour the lye solution into the oils and use a stick blender to mix until you reach “trace,” a pudding-like consistency. - Add Custom Ingredients
Stir in essential oils, colorants, or exfoliants as desired. - Pour into Molds
Pour the soap batter into silicone molds and tap gently to release air bubbles. - Cure the Soap
Let the soap set in molds for 24-48 hours, then remove and cure for 4-6 weeks in a cool, dry place, rotating occasionally for even drying.
Benefits of Homemade Soap
- Customizable: Tailor the ingredients to suit your preferences and skin needs.
- Natural Ingredients: Avoid harsh chemicals and synthetic additives.
- Eco-Friendly: Reduce waste with reusable molds and sustainable packaging.
Conclusion
Making homemade soap is both an art and a science. By following these steps and adhering to safety and regulatory standards, you can create high-quality, customized soaps to suit your preferences. One of the most enjoyable aspects of soap making is the possibility of incorporating essential oils, to enhance the fragrance of the soap.
For your convenience, our website offers a wide selection of premium essential oils, perfect for adding that special touch to your homemade creations. We recommend choosing organic essential oils. Whether you make soap for personal use or as part of a business, the possibilities for creativity and customization are endless, making this craft versatile and deeply rewarding.